Orbiting Text in Fireworks
Recently a Fireworks user asked, “I know how to attach text to a path, but how do I make it look like the text is on the rings of Saturn and orbiting a planet?”
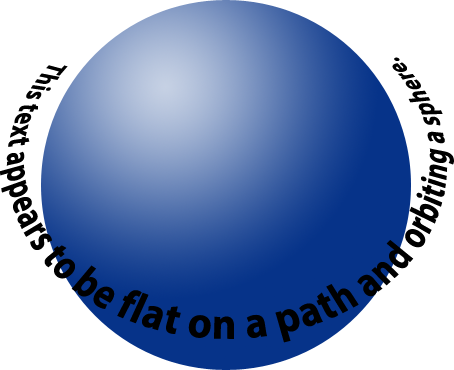
With just a few tweaks to text attached to a path and a little bit of skewing, we can create this look in only a few steps.
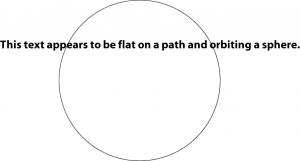
First, draw a circle (hold down the SHIFT key while drawing with the ellipse tool to get a perfect circle.) Make it larger than the size you want for the final “orbit”, because it will get smaller when we add perspective. Then type the text you want to attach to the path. Select the font, weight, and color you want, but since the text will remain editable even after attached to the path, you can make changes later, too.
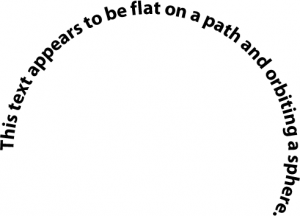
Select both the text and the path, then go to Text > Attach to Path. (Be careful which path option you select, because “Attach in Path” is a different feature that allows you to flow a block of text inside a vector shape.) Once the text is attached to the path, it will look like this:
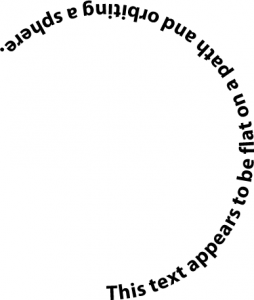
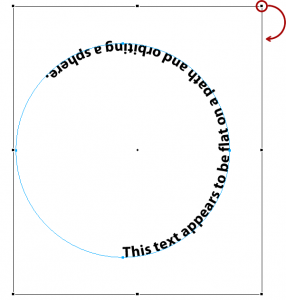
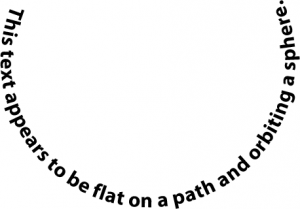
The text will be attached to the outside of the path. When text is attached to a path, it always begins at the initial node (i.e., the first or starting node on a vector path), and for a circle the initial node is on the left side. The text also runs across the top of the circle, but we want the orbiting text to run across the bottom of the circle. Go to Text > Reverse Direction, and the text will move to start at the terminal node (i.e., the last or ending node on a vector path) and will follow the path in the opposite direction on the inside of the circle.
Now that the text is moving in the right direction, we just need to rotate it so that the center of the text passage is at the bottom of the circle. Select the text on a path object and switch to the Scale Tool. Position the cursor near the top right corner and it will change into a rotate symbol. Do not place the cursor directly on the top right corner (this is how you scale the size of the selected object), but merely place the corner near the top right corner to access the rotate functionality.
Once the text has been rotated into the correct position, it will look like you are viewing it by looking down at the North Pole of the planet, not like the rings of Saturn as viewed from the side of the planet.
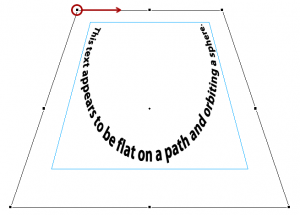
We need to add perspective to make it look like the text is laying on the rings orbiting a planet. First, select the text and switch to the Skew Tool. Place the cursor on the top left corner and push it toward the center of the selection. Both the left and right corners will move toward the center in unison; this ensures that we get an even skew on the object. This will make it look like it receding into the distance.
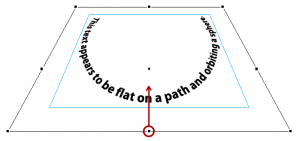
Although we made it recede into the distance, it is distorted and no longer looks round, so we need to “squish it” a little to make it look like a circle in perspective. Select the text and switch to the Scale Tool. Place the cursor on the bottom center point and move it upward toward the top of the circle until the text looks more like a circle in perspective.
Now the text looks like it is laying on the rings of Saturn and orbiting something. All we need now is to add a planet. Draw another circle with a radius just narrower than the orbiting text and give a fill with a radial gradient to simulate light on a globe. Move the globe behind the orbiting text and position it so that the text forms a ring around it.
And that’s it – orbiting text!
how do I place the text on top of the globe.The text keeps going behind.? I’m new.
Bobby,
You can control how objects “stack up” on the canvas two ways:
(1) put the text on one layer and the globe on another layer, and make sure the layer with globe is below the layer with the text in Layers panel
(2) if the globe and the text are on the same layer, then make sure that the globe appears below the text within that layer.
You can drag objects up and down within the Layers panel, or drag layers up and down.
You can also use the Modify > Arrange options to move objects forward, backward, to the front, and to the back.
Finally, there are toolbar icons for the Arrange options that look like little stacks of squares – these are one-click shortcuts for the Arrange options.
Dave